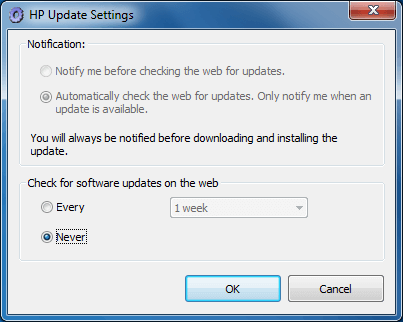
HP OfficeJet 8725 Firmware Update: How to Disable Automatic Firmware UpdatesHP W1420Τσιπ με στάθμη γραφίτη 1. Αντικαταστήστε την κασέτα όταν ο εκτυπωτής είναι ενεργοποιημένος, διαφορετικά μπορεί να προκληθεί πρόβλημα όταν ο εκτυπωτής είναι απενεργοποιημένος. Σε περίπτωση που συμβεί, ανακτήστε το ανοίγοντας και κλείνοντας το κάλυμμα του εκτυπωτή.
Τη 2η φορά που χρησιμοποιούσε τον ίδιο αριθμό σειράς στον ίδιο εκτυπωτή, ο εκτυπωτής θα ανέφερε ένα σφάλμα "Er11". Η κασέτα μπορεί να συνεχίσει να λειτουργεί εάν ο πελάτης ανοίξει το κάλυμμα για περισσότερα από 3 δευτερόλεπτα και κλείσει το κάλυμμα, μεταβείτε στη ρύθμιση "χωρίς επίπεδο γραφίτη" για χρήση. Μην αφαιρείτε το τσιπ σε οποιονδήποτε άλλο εκτυπωτή αφού εγκατασταθεί και χρησιμοποιηθεί.
Τσιπ χωρίς στάθμη γραφίτη
Συμβουλέψτε τον πελάτη σας να αγοράζει μόνο μία κασέτα ανά φορά για να αποφύγει το πρόβλημα της σειράς τσιπ. Εάν το συμβατό σας δοχείο είναι άδειο, επικοινωνήστε μαζί μας πριν υποβάλετε επαναλαμβανόμενη παραγγελία. Θα ελέγξουμε τον αριθμό σειράς του τσιπ και θα βεβαιωθούμε ότι δεν θα λάβετε νέες κασέτες με την ίδια σειρά τσιπ. HP Ink Cartridges "Missing Or Damaged" / "Remove And Reinstall" (Firmware Update)O Εκτυπωτής Βγάζει Μήνυμα Πως Το Μελανοδοχείο Είναι Κατεστραμμένο Η παραπάνω ένδειξη εμφανίζεται κυρίως στα μοντέλα HP της σειράς OfficeJet Pro 6230, 6810, 6820, 6830, 8610, 8620, 8630, 8640, 8660, X451dn/dw, X476dn/dw, X551dw, X576dw και αφορά τη χρήση συμβατών η αναγομωμένων μελανοδοχείων. Η λύση δίνεται στον επίσημο ιστότοπο της HP, απ’ όπου ο χρήστης κατεβάζει νέο firmware που αντιστοιχεί στο μοντέλο του εκτυπωτή του και με το οποίο αφαιρείται το Dynamic Security Feature που προκαλεί το πρόβλημα. Στην περίπτωση που αντιμετωπίζετε ανάλογο πρόβλημα, επισκεφθείτε την ιστοσελίδα της HP κάνοντας κλικ ΕΔΩ και ακολουθήστε τις οδηγίες.
Δείτε και εδώ!
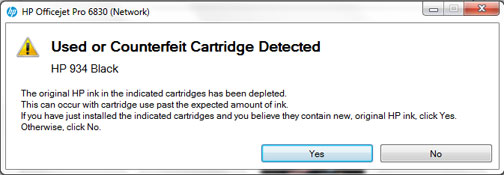
HP 934, 934XL, 935 & 935XL Ink Cartridge ErrorsNOTE:“Empty”, “Low Ink”, “Out of Ink“, “? Marks“, “Used“, “Counterfeit”, “Refilled or Depleted Cartridge Detected” and “Non-Genuine Cartridge” alerts are COMPLETELY NORMAL for all HP 934, 934XL, 935 & 935XL black and color ink cartridges which have been refilled and are initially installed into the printer. These nuisance messages may be bypassed and normal printing will be available. Since new replacement chips were installed, ink level monitoring will be available. NORMAL Cartridge Alerts 1) Upon installation of a refilled HP 934, 934XL, 935 & 935XL ink cartridge you will observe various ‘Used’, ‘Counterfeit’ & ‘Non-HP’ alert messages. Choose ‘Yes’, ‘Continue’ and/or ‘OK’ to bypass the various nuisance alerts. This will enable normal print operations.
2) Since the HP 934, 934XL, 935 & 935XL cartridges have new replacement chips installed, ink level monitoring will be available. NOTE: Upon refilled cartridge installation the printer may show a “Low Ink” alert message one time, simply select ‘OK’ to proceed.
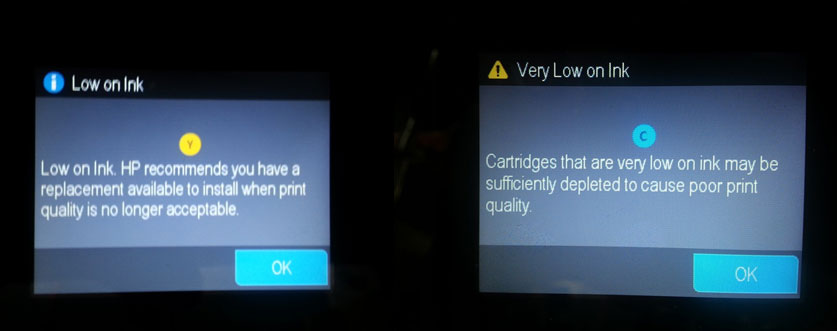
3) During normal printing you will observe two levels of ink low warning messages – this is normal.
ABNORMAL Cartridge Alerts If the printer cannot recognize the ink cartridge (i.e. “Cartridge Error”, “Missing or Damaged”, “Unrecognized Cartridge”, etc.), then first re-seat the ink cartridge(s) in the carriage. If this does not correct the problem, remove the suspect cartridge and carefully inspect the smart chip on the bottom. The chip should be present (two different types shown below) and there should be NO cuts or gashes on the micro-chip surface as this may render the cartridge unusable.
If the problem persists, then remove all 4 cartridges from the carriage. Pull up on the PRINTHEAD release latch (at right side) and remove PRINTHEAD. Inspect electrical contacts on PRINTHEAD and on Carriage for ink residue. Adhering to manufacturer instructions, thoroughly clean the electrical contacts. Reinstall the PRINTHEAD and lower latch to secure. Reinstall cartridges and retest. For more information click here:
Connectivity problems, between the cartridge and Printhead, include error messages such as “Unrecognized“, “Missing or Damaged“, or “Ink Cartridge Problem”. Also refer to NOTE at bottom of page. 1. Remove ALL ink cartridges. 2. Check cartridge chip surface for ink residue/contaminants; thoroughly clean chip contact area using a water or isopropyl moistened towel. 3. Install ALL ink cartridges to see if problem clears. An “Incompatible Printhead” or “Alignment Failed” error message is NOT an ink cartridge error, but instead a possible failure indicator of the large electronic assembly used for firing all four (or five) colors onto the paper. If you observe this message it is suggested you visit HP for recommendations on how to correct. General HP ink series printhead removal procedures are provided below for informational purposes only. To check the electrical performance of the printhead refer to the diagnostic test for your specific printer model, click here:
If you encounter a severe ink cartridge error which prohibits printing, perform the recommended solutions below. If you think the refilled cartridge might be bad, take it back to your refiller and have them re-check the cartridge. Recommended Solutions The contact between the ink cartridge and the printer must be clean for proper functioning. If any dirt, ink or paper dust is on the contacts, the printer may indicate that the ink cartridge is bad. To ensure a clean contact, follow the steps below: 1) Remove and re-install the cartridge
2) Re-set the printer: a. If the problem persists, it may be useful to perform a “hard reset”. This can correct an electronic flag setting inside the printer telling it that the print cartridge is problematic. From the printer’s main menu, select (Note: printer buttons will NOT be illuminated):
Inside the Service Menu, locate the Resets Menu, select Semi-Full Reset to reset the printer. b. Refer to diagnostic test file for additional printer model specific instructions, click here:
c. Print a test page to determine if the problem has been resolved. d. If a printing-related problem persists, see below. Severe Print Quality Issue or Missing Colors 1) If any streaks or missing colors appear on prints, initiate a ‘Clean Printhead’ via the printer control panel ‘Setup’/’Tools’ menu. On some printer models, the ‘Clean Printhead’ procedure will yield a test pattern – inspect pattern to ensure all colors are firing and solid bands of color appear. With other printer models you will need to select a test/diagnostic print under the ‘Tools’ menu. You may need to perform the ‘Clean Printhead’ procedure several times if the printer has been idle or rarely used.
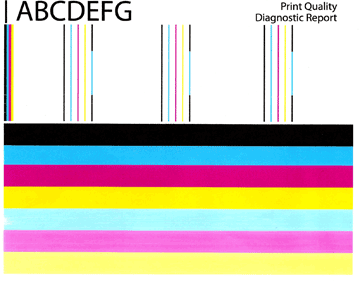
2) To verify all colors are firing properly, print a Self Test page or Print Quality Report under the tools or maintenance menu. You may also select an Inkjet411 test print by clicking the button below: A normal looking Print Quality Report (i.e. internal printer test) is pictured below:
3) If all colors are printing but you observe cross-contamination (colors appear to bleed onto each other), then it is suggested to clean the service station…click here for instructions:
4) If you cannot identify which color cartridge is empty, print a test/diagnostic page via: 1) your printer control panel or 2) via the ‘Test Prints’ button below. A faded/missing color indicates empty. In the examples below, streaking/banding can be observed – running the ‘Clean Printhead’ can help remedy these issues.
5) If missing colors or severe/poor print quality continues to be observed following a 72 hour wait period (i.e. allows enough time for ink to fully absorb into cartridge foam), then flush the Printhead. Check your printer’s User Manual to see if your printhead can be easily removed. HP 932XL/933XL/950XL/951XL Cartridge Non-Recognition Message
HP 950XL/951XL Cartridge Protection (HP OfficeJet Pro 8100 / 8600)HP OfficeJet Pro 8600 Στον πίνακα ελέγχου του εκτυπωτή, αγγίξτε το (δεξί βέλος) (right arrow) και μετά αγγίξτε το (Ρύθμιση) (Setup).
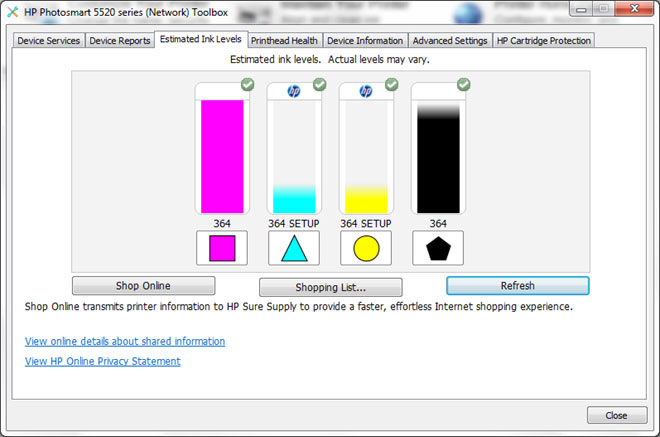
Στον πίνακα ελέγχου του εκτυπωτή, πατήστε παρατεταμένα τα κουμπιά (Ασύρματο) (Wireless) και (Συνέχιση) (Resume) Οι HP Officejet 8100 και 8600 διαθέτουν δυνατότητα "προστασίας κασετών". Στην εργαλειοθήκη του driver (στον υπολογιστή) υπάρχει μια καρτέλα με το όνομα "HP Cartridge Protection", όπου μπορείτε να επιλέξετε εάν θέλετε να ενεργοποιήσετε ή να απενεργοποιήσετε αυτήν τη λειτουργία. Η προεπιλεγμένη ρύθμιση εδώ είναι "enable" που έχει ως αποτέλεσμα τα δοχεία να λειτουργούν μόνο σε αυτόν τον συγκεκριμένο εκτυπωτή. Εάν εγκαταστήσετε τα δοχεία που έχουν υποστεί επεξεργασία με αυτήν τη δυνατότητα «προστασίας» στον εκτυπωτή, δεν θα λειτουργήσουν και θα εμφανιστεί ένα μήνυμα. Προστασία δοχείων HP σε δοχεία μελάνης 950XL HP M254, M153, M154, M180, M181, M280, M281 ΥΠΟΒΑΘΜΙΣΗ ΕΚΤΥΠΩΤΩΝ
HP CF259 (A/X) CF259 (A/X) - HP LaserJet Pro - A "Cartridge Is Low" Or "Cartridge Is Very Low" Message Displays On The Printer Control PanelΑλλάξτε τις ρυθμίσεις "Very Low" από τον πίνακα ελέγχου Προσδιορίστε πώς θα σας ειδοποιεί ο εκτυπωτής για πολύ χαμηλά επίπεδα κασετών.
1. Από την Αρχική οθόνη στον πίνακα ελέγχου του εκτυπωτή, σύρετε την καρτέλα στο επάνω μέρος της οθόνης προς τα κάτω για να ανοίξετε τον Πίνακα εργαλείων και, στη συνέχεια, αγγίξτε το εικονίδιο Ρύθμιση .
2. Κάντε κύλιση και ανοίξτε τα ακόλουθα μενού: ● Supply Settings ● Black Cartridge ● Very Low Setting
3. Επιλέξτε μία από τις ακόλουθες επιλογές: (Προτείνουμε την επιλογή CONTINUE!)
● Επιλέξτε την επιλογή STOP για να ρυθμίσετε τον εκτυπωτή να σταματήσει την εκτύπωση μέχρι να αντικαταστήσετε την κασέτα τόνερ. ● Επιλέξτε την επιλογή Prompt για να ρυθμίσετε τον εκτυπωτή να σταματήσει την εκτύπωση και να σας ζητήσει να αντικαταστήσετε την κασέτα τόνερ. Μπορείτε να αναγνωρίσετε το μήνυμα και να συνεχίσετε την εκτύπωση. ● Επιλέξτε την επιλογή Continue για να ρυθμίσετε τον εκτυπωτή να σας ειδοποιεί ότι η κασέτα τόνερ είναι πολύ χαμηλή, αλλά να συνεχίσει την εκτύπωση. HP 912XL (96X/91X) ΑΠΕΝΕΡΓΟΠΟΙΗΣΗ ΑΝΑΒΑΘΜΙΣΕΩΝ Μέσω WiFiΜε την αναβάθμιση του νέου υλικολογισμικού 2151B σε εκτυπωτές της σειράς 91X μέσω WiFi στις 6 Ιανουαρίου 2022, δεν αναγνωρίζονται τα μελάνια από τους ισχύοντες εκτυπωτές της.
H HP έκανε αναβάθμιση στις 06 Ιανουαρίου & Ιούνιο στους συγκεκριμένους εκτυπωτές με αποτέλεσμα να δέχονται για την ωρα μόνο γνησια! Οι πελάτες που έχουν τους συγκεκριμένους εκτυπωτές πρέπει να απενεργοποιήσουν τις αυτόματες αναβαθμίσεις από το menu του εκτυπωτή εφόσον θέλουν να προμηθευτούν συμβατά.!
 Αυτή η οδηγία αφορά τους εκτυπωτές HP που χρησιμοποιούν δοχεία μελάνης σειράς 96X/91X Αυτή η οδηγία αφορά τους εκτυπωτές HP που χρησιμοποιούν δοχεία μελάνης σειράς 96X/91X
Η προεπιλεγμένη ρύθμιση του εκτυπωτή σας συνήθως ελέγχεται για αυτόματη αναβάθμιση υλικολογισμικού. Αυτό σημαίνει ότι ο εκτυπωτής σας θα εγκαταστήσει αυτόματα αναβαθμίσεις υλικολογισμικού χωρίς να σας ζητήσει ή/και να ζητήσει τη συγκατάθεσή σας. Μόλις ολοκληρωθεί η αναβάθμιση υλικολογισμικού, την επόμενη φορά που θα εγκαταστήσετε μια μη γνήσια κασέτα, ο εκτυπωτής σας ενδέχεται να εμφανίσει πρόβλημα με την κασέτα. Αυτό γίνεται για να αποτρέψετε τη χρήση μη γνήσιων δοχείων. Έχετε απολύτως το δικαίωμα να χρησιμοποιείτε κασέτες τρίτων κατασκευαστών στον εκτυπωτή σας. Εάν ο εκτυπωτής σας λειτουργεί καλά με κασέτες τρίτων κατασκευαστών και θέλετε να συνεχίσετε να τις χρησιμοποιείτε, σας συνιστούμε να απενεργοποιήσετε τη λειτουργία "Ενημέρωση εκτυπωτή" στον εκτυπωτή σας.
ΑΠΕΝΕΡΓΟΠΟΙΗΣΗ ΑΝΑΒΑΘΜΙΣΗΣ Μεταβείτε στον πίνακα ελέγχου του εκτυπωτή, επιλέξτε Ρύθμιση(Ρύθμιση)→ Συντήρηση εκτυπωτή(Εργαλεία)→ Ενημέρωση του εκτυπωτή → Επιλογές ενημέρωσης εκτυπωτή (Αυτόματη ενημέρωση) → Μη έλεγχος (Απενεργοποίηση). Όταν βλέπετε "Θέλετε να ενεργοποιήσετε τις Ενημερώσεις εκτυπωτή;" επιλέξτε "Όχι" και πατήστε "Αρχική σελίδα" 2. Μην αγγίζετε ή γρατσουνίζετε τα τσιπ HP 150nw / 150a / 178nw / 179fnw Replace Or Install Waste Toner ContainerHP Απενεργοποιήστε Τη Δυναμική ΠροστασίαH HP έχει προσθέσει ένα ακόμη χαρακτηριστικό ασφάλειας στο λογισμικό της που μπλοκάρει τη χρήση των συμβατών μελανιών και toner. To χαρακτηριστικό αυτό ονομάζεται Dynamic Security (δυναμική ασφάλεια δοχείων). Αν θέλετε να χρησιμοποιείτε συμβατά μελάνια και toner στους HΡ εκτυπωτές σας, τότε θα πρέπει να το απενεργοποιήσετε. Δείτε στα παρακάτω βήματα πως μπορείτε να το κάνετε.
Για να απενεργοποιήσετε τη προστασία δοχείων μελάνης (Cartridge Protection) ακολουθήστε τα παρακάτω βήματα:
Μπορείτε να απενεργοποιήσετε τη Δυναμική ασφάλεια δοχείων αλλά και τη προστασία Δοχείων και μέσα από το web interface του εκτυπωτή σας.
HP M404 Απενεργοποίηση ΑναβαθμίσεωνHP Firmware Downgrade For Printers Using HP 953XL HP 903XL Ink CartridgesΚάντε λήψη της κατάλληλης υποβάθμισης υλικολογισμικού για τον εκτυπωτή HP OfficeJet, ώστε να μπορείτε να συνεχίσετε να εκτυπώνετε χρησιμοποιώντας δοχεία μελάνης συμβατά . Η επαναφορά του υλικολογισμικού και η υποβάθμιση σε προηγούμενη έκδοση ενδέχεται να επιτρέψουν στον εκτυπωτή HP να λειτουργήσει με την προηγούμενη έκδοση υλικολογισμικού πριν πραγματοποιηθεί η ενημέρωση. Αφού επιστρέψετε σε μια προηγούμενη έκδοση, μπορείτε να συνεχίσετε να εκτυπώνετε χρησιμοποιώντας τα συμβατά δοχεία μελάνης. Οι παρακάτω σύνδεσμοι λήψης αφορούν εκτυπωτές HP που χρησιμοποιούν δοχεία μελάνης HP 903XL και εκτυπωτές που χρησιμοποιούν δοχεία μελάνης HP 953XL.
HP 903XL Ink Cartridge Printers HP 953XL Ink Cartridge Printers Σημείωση: Η επαναφορά του υλικολογισμικού του εκτυπωτή σας σε παλαιότερη έκδοση ενδέχεται να επηρεάσει άλλες λειτουργίες. Ανατρέξτε στις σελίδες υποστήριξης του εκτυπωτή σας για συγκεκριμένες λεπτομέρειες σχετικά με τις αλλαγές υλικολογισμικού.
How To Downgrade HP Printer FirmwareFirmware updates are typically released to address firmware bugs, crashes, or issues in order to improve printer performance. However, if you use remanufactured or third-party ink cartridges, this is not the case. Dynamic Security-Enabled HP PrintersSince 2016, HP has included dynamic security in their firmware update, designed to limit third-party ink cartridges' use. As per HP, dynamic security-enabled printers are only meant to function with cartridges that have brand-new or repurposed HP chips or electronic circuitry. This feature has been added by them to block non-HP chips, modified, or non-HP electronic circuitry. How Would I Know If My Printer's Firmware Has Been Updated?Printer manufacturers can automatically update your printer's firmware without your knowledge, especially if it is connected to your Wi-Fi or via a cable directly connected to your computer with an internet connection. The firmware update may impact you if you are receiving error messages like "Cartridge is missing or damaged", "Remove and reinstall ink cartridge", "Cartridge not being recognized," or if your ink cartridges suddenly stop working after initially working flawlessly. Please note that once your firmware has been updated, your printer will only accept OEM or original ink cartridges unless you remove the dynamic security feature, reset printer to its default settings, or download its older firmware version, which will be discussed later in this how to downgrade hp printer firmware article. How Can I Avoid This Update?We highly suggest you check and read carefully any message that pops up on your computer or printer screen and not accept it if prompted for a firmware update. It will also be best to disable the auto-update feature in printer settings or remove the dynamic security feature. How To Remove HP's Dynamic Security?There is now a firmware update from HP that gives you the option to disable the dynamic security feature. Before you can access and remove it, you must complete the process of installing the most recent firmware. To prevent further problems, we strongly advise you to disable the auto-update feature if you prefer this solution. Only the printers listed below can use the update:
If you prefer this approach, you can follow the instructions in HP's update the firmware on an HP printer guide to install the most recent firmware while disabling the dynamic security feature. You can reset or downgrade firmware if you don't want to take the chance. HP Printer Firmware Reset InstructionsRestoring the printer to its factory default settings is the simplest way to turn off cartridge protection. This can be done by pressing the control panel display buttons on the printer.
NOTE: If you currently have an installed "protected" ink cartridge, you must replace it with a new cartridge and dispose of the old one. Any new HP ink cartridge you install in your printer going forward won't be protected; it can be filled and used again, recycled, and then remanufactured for use by another customer. HP Printer Firmware Downgrade Download Tips for HP 90x/95x/97x Series Printers Recently, HP released a firmware update. If you are not yet affected by this, you can refer to the instructions below on disabling future HP firmware upgrades to avoid auto-updates. Otherwise, if you are one of those that are affected by these recent HP firmware changes, then you can refer to our HP printer firmware downgrade download tips below. NOTE: There might be some cases that you won't be able to downgrade the new firmware in your printer. Please proceed with caution. How To Downgrade HP Printer Firmware
Disable Printer Firmware Update For HP M182nw M183fw M254nw M255nw M454dnhttps://www.youtube.com/watch?v=Za79lrKfYjc&ab_channel=YBToner HP 963 – Firmware Downgrade InstructionsFIRMWARE DOWNGRADE INSTRUCTIONS Εάν έχετε σε απόθεμα μελάνια τα οποία δεν λειτουργούν λόγω της ενημέρωσης υλικολογισμικού, κάντε απλώς κλικ στο μοντέλο του εκτυπωτή σας παρακάτω και ακολουθήστε τις οδηγίες εγκατάστασης. Ενδέχεται να εμφανιστεί μια προειδοποιητική οθόνη των Windows με το μήνυμα "Don't run", σε αυτήν την περίπτωση κάντε κλικ στο "more info" και κάντε κλικ στην επιλογή "Run anyway" που εμφανίζεται.
HP OfficeJet Pro 9010 / 9012 / 9014 / 9015 / 9016 / 9019
The HP Printer Update window will open and your printer serial number should be visible on the display. Select the checkbox next to the serial number and then click “Update” If your printer is using a wifi connection, you will need to connect a USB cable to the printer and computer to get your serial number to display. Once you have connected the cable, wait for about 20 seconds and click “Refresh”. This should trigger the serial number to appear in the window and you can then select the checkbox and click “Update”. Select “OK” after the update is complete. Now you can start printing with your printer cartridges again! Please remember to turn off the automatic firmware updates on your printer after this new update is installed. Turning off these updates will prevent future automatic updates from HP so you can keep printing with cartridges.
How To Turn Off Firmware Updates On HP Printers Using HP 963 Ink CartridgesHP released a wireless firmware update that may affect your ability to use HP 963 cartridges. If your printer updates to this latest firmware version it could prompt a cartridge problem message on your printer’s display, stopping you from using cartridges. Customers that want to continue using cartridges may choose to avoid this update. In the guide below, we show you how to disable the automatic firmware updates on your printer so you can print without interruption.
Disabling automatic HP firmware updates via the printer’s control panel Please follow the instructions below:
2. A new menu appears. Click on Setup at the top left of the menu.
3. The configuration menu will open. Scroll down to Printer Maintenance.
4. Click on Printer Maintenance and then on Update the Printer.
5. Choose Printer Update Options and then Do Not Check.
6. Press NO when asked if you want to turn on Printer Updates.
Going forward HP will not be able to alter your firmware.
Alternatively…
2. The configuration menu will open. Scroll down to Extra and press OK.
3. On the following screen, scroll down to Update the printer and press OK.
4. Select Update automatically and press OK.
5. Scroll down to off and press OK.
6. You’ll see the following screen.
7. Press NO. From then on, HP will not be able to alter your firmware.
** Σημείωση: Η Επαναφορά Του Υλικολογισμικού Του Εκτυπωτή Σας Σε Παλαιότερη Έκδοση Ενδέχεται Να Επηρεάσει Άλλες Λειτουργίες. Ανατρέξτε Στις Σελίδες Υποστήριξης Του Εκτυπωτή Σας Για Συγκεκριμένες Λεπτομέρειες Σχετικά Με Τις Αλλαγές Υλικολογισμικού.HP 912 – Firmware Downgrade InstructionsHP 912 – Firmware Downgrade Instructions
FIRMWARE DOWNGRADE INSTRUCTIONS If you have inks in stock that do not register that you received after March 2020, due to the firmware update, then please simply now click on your model of printer below and follow the install prompts. You may have a windows warning screen with “Don’t run” message appear, in this case click “more info”, now click the “Run anyway” option that appears. HP Officejet Pro 8012/8014/8015/8017 HP Officejet Pro 8012e/8014e/8015e/8017e HP Officejet Pro 8022/8023/8024/8025 HP Officejet Pro 8022e/8023e/8024e/8025e
** Please Note: Reverting Your Printer Firmware To An Earlier Version May Affect Other Functionality. Please See Your Printer’s Support Pages For Specific Details On Firmware Changes.
The HP Printer Update window will open and your printer serial number should be visible on the display. Select the checkbox next to the serial number and then click “Update” If your printer is using a wifi connection, you will need to connect a USB cable to the printer and computer to get your serial number to display. Once you have connected the cable, wait for about 20 seconds and click “Refresh”. This should trigger the serial number to appear in the window and you can then select the checkbox and click “Update”. Select “OK” after the update is complete. Now you can start printing with your printer cartridges again! Please remember to turn off the automatic firmware updates on your printer after this new update is installed. Turning off these updates will prevent future automatic updates from HP so you can keep printing with cartridges.
How To Turn Off Firmware Updates On HP Printers Using HP 912 Ink CartridgesHP released a wireless firmware update that may affect your ability to use HP 912 cartridges. If your printer updates to this latest firmware version it could prompt a cartridge problem message on your printer’s display, stopping you from using cartridges. Customers that want to continue using cartridges may choose to avoid this update. In the guide below, we show you how to disable the automatic firmware updates on your printer so you can print without interruption.
Disabling automatic HP firmware updates via the printer’s control panel Please follow the instructions below:
2. A new menu appears. Click on Setup at the top left of the menu.
3. The configuration menu will open. Scroll down to Printer Maintenance.
4. Click on Printer Maintenance and then on Update the Printer.
5. Choose Printer Update Options and then Do Not Check.
6. Press NO when asked if you want to turn on Printer Updates.
Going forward HP will not be able to alter your firmware.
Alternatively…
2. The configuration menu will open. Scroll down to Extra and press OK.
3. On the following screen, scroll down to Update the printer and press OK.
4. Select Update automatically and press OK.
5. Scroll down to off and press OK.
6. You’ll see the following screen.
7. Press NO. From then on, HP will not be able to alter your firmware. HP 6950 6951 6954 6962 6964 6975 Disable Printer Firmware Update |

